Activiti Cloud meets Kubernetes (and they like each other)
For the last two weeks, we have spent most of our time making sure that we can deploy Activiti Cloud components to Kubernetes. We’ve now shown how we can deploy Activiti cloud in the following environments:
- Docker Compose (Development)
- MiniKube (Development Environment - but a little bit more real)
- Kubernetes (hosted in AWS)
The results can be found inside our cloud examples repository, where you will find docker compose and kubernetes descriptors to start these environments (docker / kubernetes directories). The most interesting bit of this deployment is that is composed of separate descriptors, one for the “Infrastructure” and another for each “Runtime Bundle” that we want to deploy/publish. Cloud Connector deployments will come next.
This means that in contrast with “normal” kubernetes deployments which are “static”, this deployment needs to deal with new Activiti Cloud Applications (Runtime Bundles, Query, Audit and Cloud Connectors) that will be deployed on demand based on business requirements.
If you remember, from my previous blog post about Activiti Cloud, we have the following components in our environment:
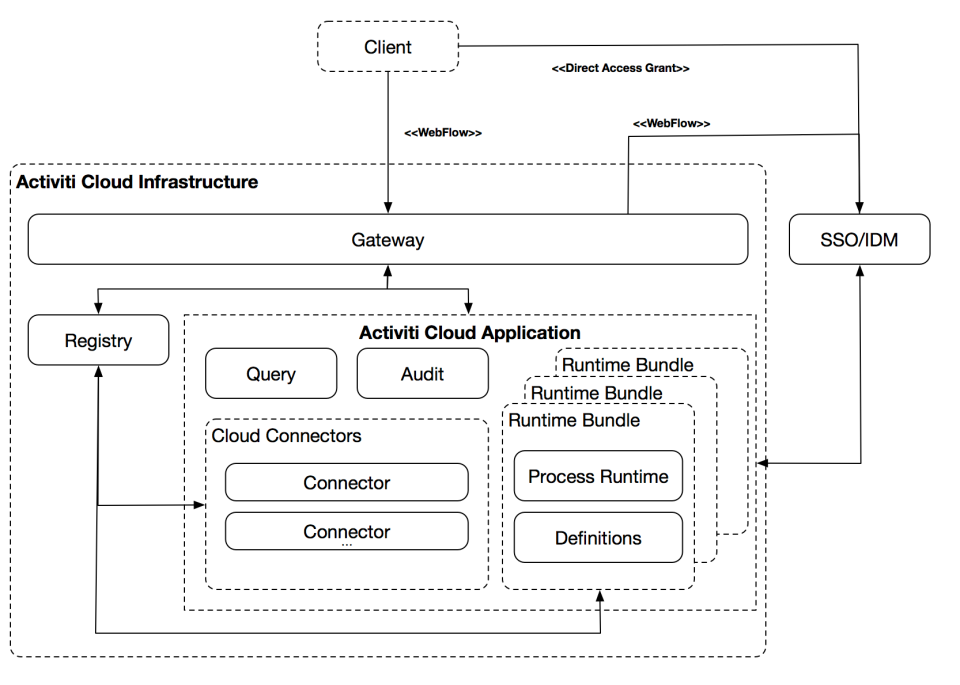
From this diagram, we can see the static components (that can be scaled using a load balancer) and the dynamic Activiti Cloud Applications.
Activiti Cloud Applications and their components will depend on the infrastructure to be running.
For each of these components we have separate Docker Images and some of them might use separate storage (requiring more docker containers for those DBs).
Based on the previous diagram here is the list of our current set of containers, already published for the infrastructure bits in Docker Hub:
- Activiti-Cloud-Gateway (Zuul implementation)
- Activiti-Cloud-SSO-IDM (Keycloak implementation)
- Activiti-Cloud-Registry (Eureka implementation)
- RabbitMQ and PostgreSQL are also started as part of the infrastructure
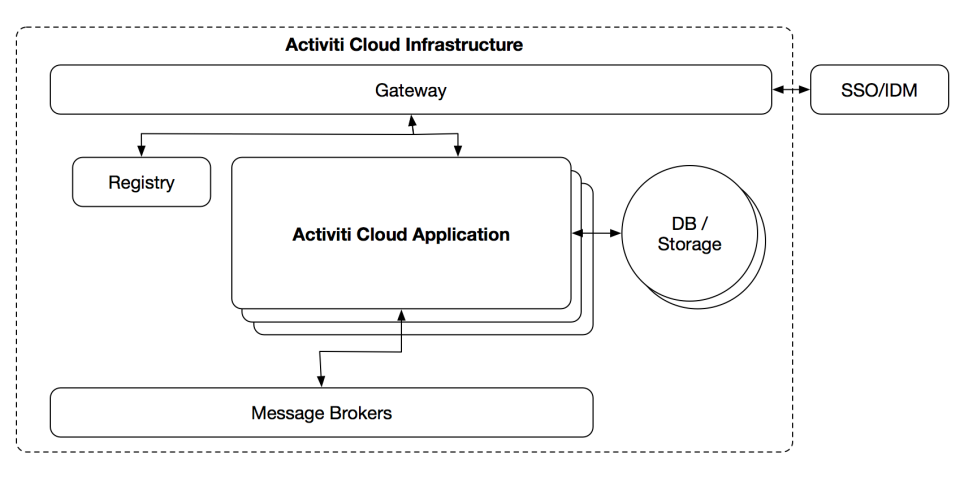
It is important to note that even if the deployment descriptor is “static”, each of these components can be scaled independently.
This infrastructure will enable our Activiti Cloud applications to use common services such as Security and Single Sign On, the Service Registry and the message brokers to produce and consume messages.
Inside this infrastructure we enable our Domain Experts to deploy one or more Activiti Cloud Applications that will contain their business processes. This approach enables the interested parties to have a high level of separation between applications and a self healing network (provided by Kubernetes) that will fix problems when they happen (and they always happen).
Activiti Cloud Applications running in this “static” infrastructure are considered dynamic because:
- Each application will be different
- We cannot estimate when these applications are going to be needed
- We cannot estimate in advance the load of each application
- We must be able to scale each application separately
- Each application can have different configurations
The services provided for Activiti Cloud Applications are:
- Activiti-Cloud-Query (JPA Implementation)
- Activiti-Cloud-Audit (JPA Implementation)
- Activiti-Cloud-Nofitications (under development)
- Activiti-Cloud-Runtime-Bundle (Base Image for your runtime bundles)
- Activiti-Cloud-Connector (Base Image for your cloud connectors)
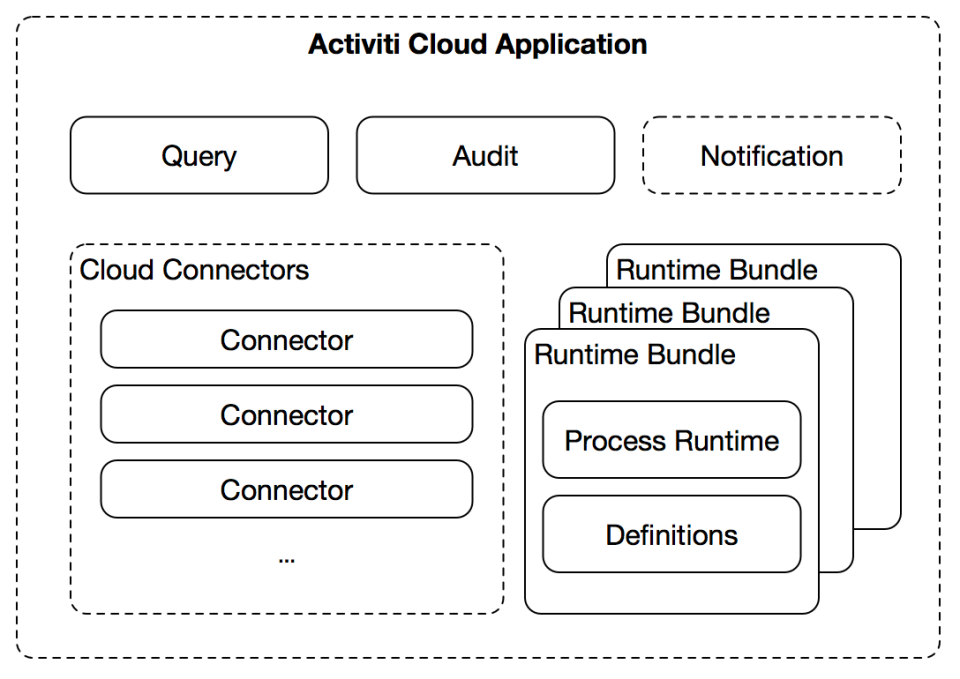
Activiti Cloud Applications will use the available infrastructure services to handle Service Lookups, Identity lookups, Single Sign On, and the Message Brokers to emit and receive events from other components.
As mentioned before, each runtime bundle can be configured against different databases or share the same instance if needed. For each application, meaning multiple runtime bundles, you can allocate a set of services that will aggregate information about execution and interaction of these runtime bundles. Some examples of these services are:
- Query Service: you might want to aggregate all the tasks and process instances from all the Runtime Bundles running inside an application.
- Audit Service: you might want to aggregate all the audit information of all the runtime bundles
- Notification Service (under development): you might want to push notifications to all your users related to the changes of state inside your runtime bundles.
Getting Started
The first decision that you will need to make is to choose between running all services with:
- Docker Compose
- Kubernetes
The main difference between these two options is the degree of similarities that you will have a with a real production environment in your local setup. I would recommend Minikube if you are planning to run in Kubernetes hosted in a cloud provider. Minikube runs inside a VM, causing the application to be running inside a different instance of an Operating System.
The Docker Compose approach is probably faster, due the fact that it doesn’t require a VM, but you will need to be careful with configurations. Remember that if you are planning to run your applications in a clustered environment, each of the services might run in a different node.
No matter which option do you choose, from a high level perspective these are the steps that you will need to perform:
- Start Infrastructure
- New runtime bundle
- Configure it
- Build it
- Deploy it
- Repeat 2 for a new Runtime Bundle
Docker Compose
If you choose the Docker Compose approach, you need to install Docker for your OS and Docker Compose will be ready to use in your terminal. (https://docs.docker.com/engine/installation/)
Then you will need to clone the github.com/activiti/activiti-cloud-examples repository or copy the contents of the docker/infrastructure.yml file into your laptop and then run:
> docker-compose -f infrastructure-docker.yml up -d

Before you can start interacting with your services you need to add an entry to your "/etc/hosts" file so the SSO component can sign the verification tokens using the same internal name as the services which are behind the gateway. We have learnt a lot about Zuul (Gateway), Keycloak and how to do SSO with microservices, so expect a blog post about that shortly.
sudo vi /etc/hosts # add for sso 127.0.0.1 activiti-cloud-sso-idm
This will start up all the infrastructure services + Audit and Query so you can focus on creating your runtime bundles.
Once you have all your infrastructure services started you can create a new Runtime Bundle Docker image with your business processes and required resources by using the project:
https://github.com/Activiti/activiti-cloud-examples/tree/master/docker-runtime-bundle
Which doesn’t require any Java or Maven and it uses our Activiti-Cloud-Runtime-Bundle Docker image as base to just include your business processes included inside the /processes/ directory. In order to build your Runtime Bundle you just build it as any docker image, by running:
docker build -t rb-my-app .
Inside the docker-runtime-bundle directory, which contains the Dockerfile specification to build the image.
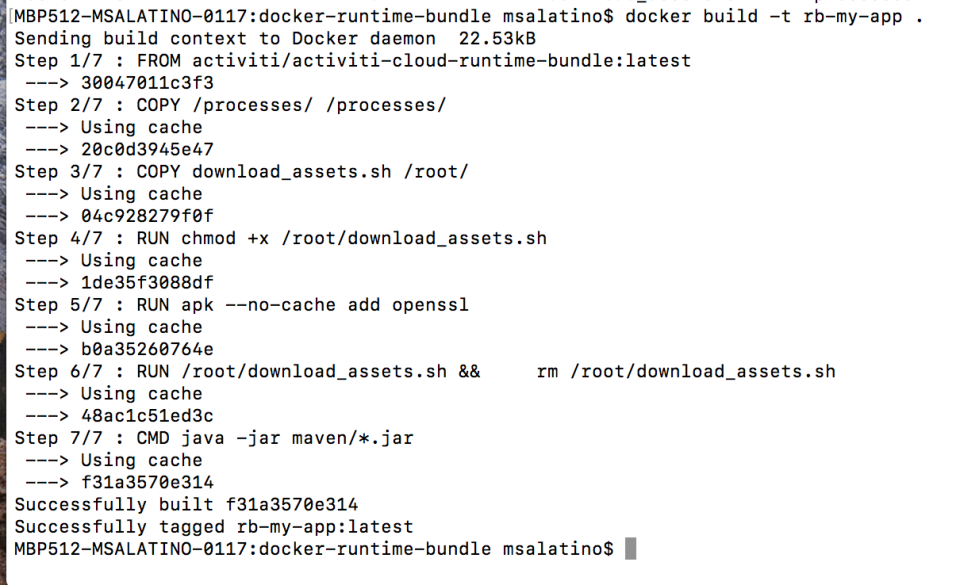
If you require more Java magic and customizations, you can use:
https://github.com/Activiti/activiti-cloud-examples/tree/master/maven-runtime-bundle which is a simple project to create runtime bundle Docker Images by using the Fabric8 Docker Maven Plugin and our Activiti-Cloud-Runtime-Starter project. You can build the docker image by running:
mvn clean install
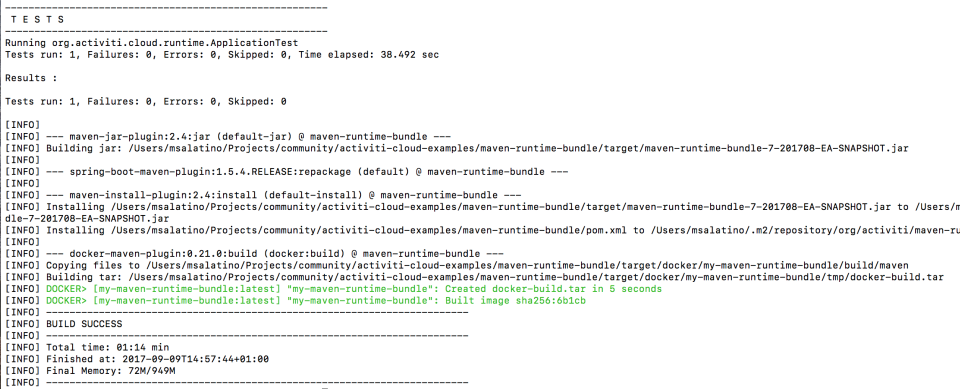
The obvious advantage of using the Java/Maven approach is that you can include unit tests for your processes and customizations.
You need to make sure to tag your docker image accordingly (https://github.com/Activiti/activiti-cloud-examples/blob/master/maven-runtime-bundle/pom.xml#L100 or when building the docker image manually with -t ) so then you can reference it in the rb-docker-compose.yml -> https://github.com/Activiti/activiti-cloud-examples/blob/master/docker/rb-docker-compose.yml#L7
Once you have your Runtime Bundle Docker Image ready you should be able to start it with:
docker-compose -f rb-docker-compose.yml up -d

At this point you have the infrastructure and one runtime bundle ready to be used.
To shut everything down run:
docker-compose -f rb-docker-compose.yml down
docker-compose -f infrastructure-docker.yml down

MiniKube / Kubernetes
With Kubernetes we will achieve a more realistic environment to test our services. By using Minikube we will achieve a similar runtime environment as with docker compose, with the big difference that kubernetes will take care to self heal our services in the case of failures.
In order to get the minikube set up and running you need to first install minikube (https://github.com/kubernetes/minikube) and start the cluster with:
minikube start --memory 8000
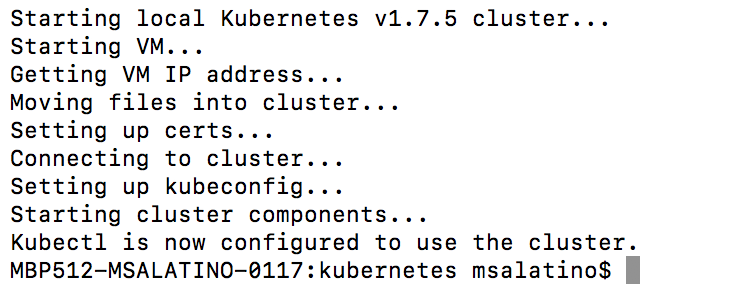
You can change the memory allocation if you want to, Activiti Cloud with the current services is using around 3GB to bootstrap all the services.
You can access to the MiniKube dashboard running:
minikube dashboard
It should look like this:
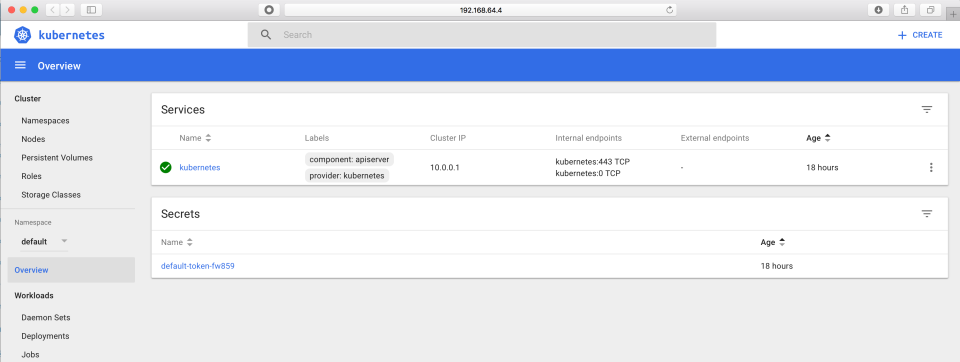
And that will give you the MiniKube entry point IP address that you need to my to your /etc/hosts file
sudo vi /etc/hosts # add for sso 127.0.0.1 activiti-cloud-sso-idm 192.168.64.4 activiti-cloud-sso-idm-kub
For my case the minikube IP address is: 192.168.64.4, but you should replace it for yours.
Once the cluster is ready you can start deploying services to it and you can do that by going to the /kubernetes/ directory inside the activiti-cloud-examples repository and run:
kubectl create -f infrastructure.yml
Look at the Docker Compose section to read more about how to build your Runtime Bundle Docker images, and when you have those ready you can do:
kubectl create -f runtime-bundle.yml
After running these commands you should see something like this in your Kubernetes Dashboard
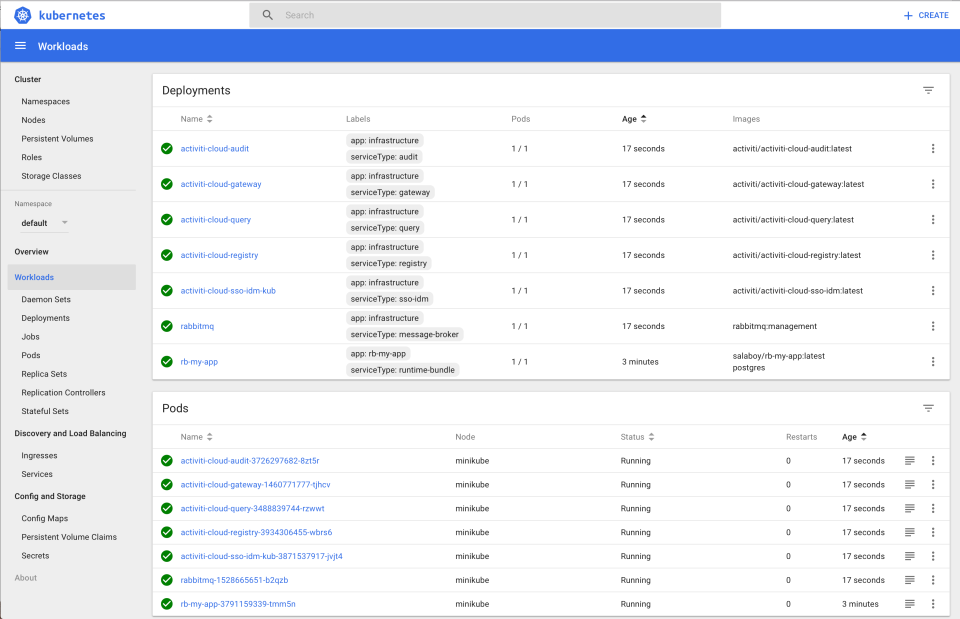
Take a look at the runtime-bundle.yml (https://github.com/Activiti/activiti-cloud-examples/blob/master/kubernetes/runtime-bundle.yml#L17 ) file for customizations regarding your Runtime Bundle image name and how to configure a Database for it. Notice that we are creating a Single Pod with both Runtime Bundle + PostgreSQL, but this is not a restriction, you can change your deployments to suit your needs.
A couple of caveats regarding this deployment:
- In minikube you can’t create service of type LoadBalancer, for that reason we are using NodePort. You will need to change this to LoadBalancer in two services: entrypoint and activiti-cloud-sso-idm-kub for a real Kubernetes environment. You will find comments explaining this in the infrastructure.yml deployments
- In minikube we need to use the NodePorts specified in the infrastructure.yml in order to interact with the Gateway and SSO services. In a real Kubernetes environment you will need to use the Service specified ports intestead.
Now that you have everything up and running, you need to know how to shut it down:
kubectl delete -f runtime-bundle.yml
kubectl delete -f infrastructure.yml
minikube stop
Is it working?
How do you test all these services? You have two options for now, but more are coming, you can use (Chrome) Postman Collection to hit the REST endpoints of these services and check that components such as Query and Audit are receiving events from our Process Executions or you can use our Demo Client App (using Angular JS) that will perform the security Web Flow, redirecting you to Keycloak UI for Single Sign On to all of our services. This simple application allow you to test the different endpoints to check that everything is working there.
(Chrome) Postman Collection
Install Postman Chrome plugin, then download (if you cloned the github repo for the cloud examples you already have this in your local environment) the collection located here: https://github.com/Activiti/activiti-cloud-examples/blob/master/Activiti%20v7%20REST%20API.postman_collection.json
Import it into Postman and then you can execute different request against these services, mostly going through the API Gateway.
Depending on your environment setup you might need to change the IP addresses of the URLs in each request:
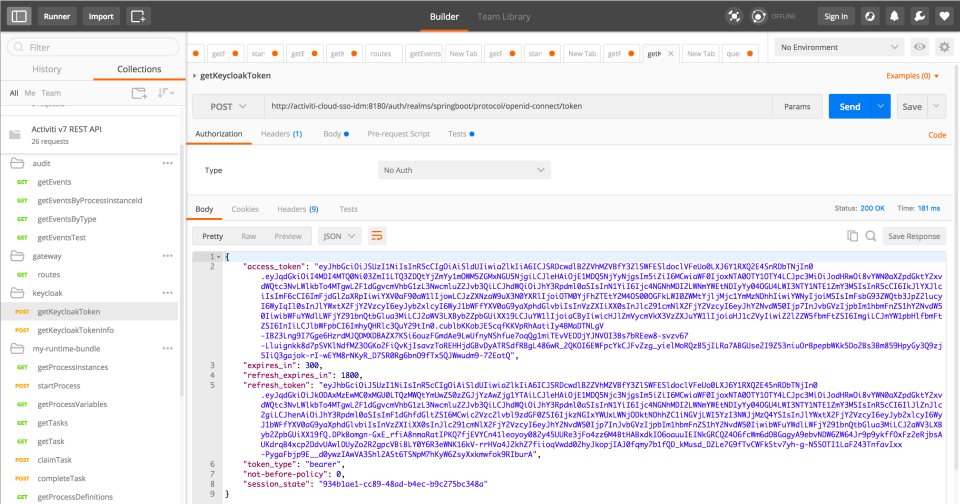
Notice that to perform any request you first need to get a Token, which will be added to all the following requests that you make against the services. The token is set to expire after 3 minutes, meaning that you might need to request a new token if you wait for longer than that between interactions.
Once you have the token you can interact with any the other services that you have deployed.
Notice also that based on the name of your runtime bundle the URL for such request might change. The API Gateway will use the name of your Runtime Bundle App to register a new route to it when it is deployed, you will need to adapt that accordingly.
Demo UI Client (Angular JS)
The other alternative, which looks more like building a client App, allows you to run an existing app that uses the Keycloak.js library to secure our rest calls and deal with requesting the token.
You can find this app in the demo-ui-client (https://github.com/Activiti/activiti-cloud-examples/tree/master/demo-ui-client ) directory of the activiti-cloud-examples repository.
The README file in that directory guides you through the steps to execute the application.
Once you started the server you can access to:
http://localhost:3000/#/main
In your browser and you should see something like this:
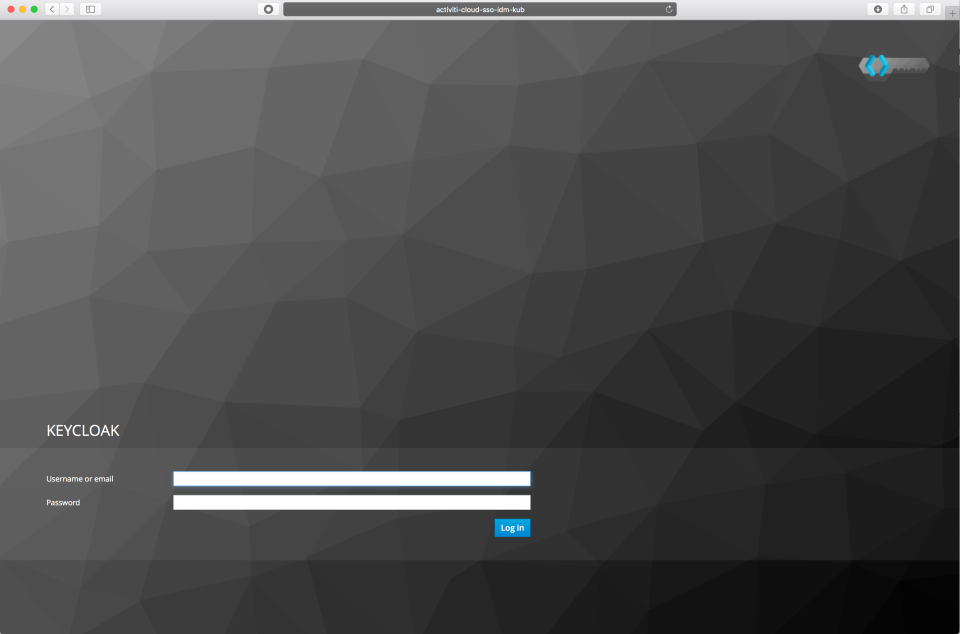
This is Keycloak kicking in, asking you for your credentials. You can use testuser/password to login and proceed to the application:
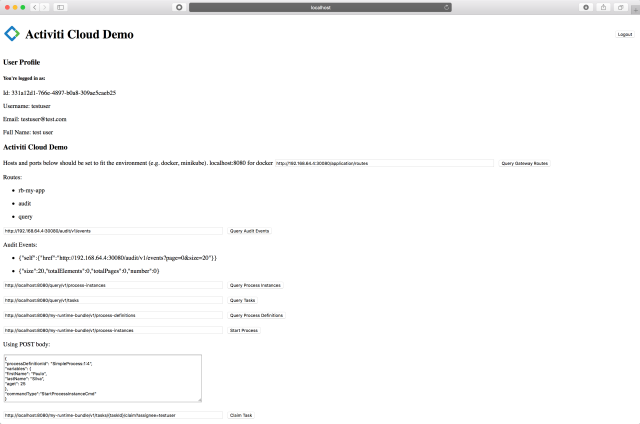
Again, here you will need to replace to your environment IP depending what setup are you testing. If you are running with Docker Compose (default URL to localhost) you can go ahead and execute some requests.
This should give you a high level idea about how to interact with these services and how to deploy new Runtime Bundles when you need them.
Sum up
On this very long blog post we have covered how to setup and run the Activiti Cloud Infrastructure and how to get one domain specific runtime bundle up and running. We will build up on the assumption that the infrastructure will provide a common set of services that each of the Activiti Cloud Applications will have available to use. We are also writing a GitBook to make sure that we document these components and these tutorials in a comprehensive way. We are just starting so we will appreciate any feedback or help that you might want to send our way.
